Friday, December 20, 2013

Jorge's Holiday S'Nog

Some call it the "ultimate eggnog" while others are too busy drinking it to call it anything! This year, I decided to try my hand at making my own eggnog for the Holidays--an adult eggnog. I find the packaged eggnog in the stores to be too thick, too sweet, and too, well, packaged. I was looking for something more sophisticated, something I would be proud to serve my Holiday party guests. And something I could bottle and give to friends.

I found a good starter recipe from Epicurious and adapted it as my own. The original recipe called for vanilla sugar--a lot of vanilla sugar. When you can find it, it is very expensive. I also like a lot of vanilla flavor in my eggnog so wanted to have the freedom to adjust it to my taste. In any case, here's what I came up with. It is very, very, easy to make and you don't have to worry about the raw eggs because the alcohol takes care of any issues there. Yum!

Ingredients


  • 6 large eggs
  • 3/4 cups fine, granulated sugar
  • 1 tsp. vanilla
  • 1 quart of Half-and-Half
  • 1 cup of brandy (recommend E&J)
  • 2 cups dark rum (recommend Meyers)
  • freshly grated nutmeg

Method


  1. In a Kitchenaid mixer, or similar, beat eggs until pale yellow and slightly frothy.
  2. While the mixer is running, slowly add the sugar to the eggs.
  3. Add the Half-and-Half and vanilla mixing until all sugar is dissolved.
  4. Continue mixing and add brandy and rum.
  5. Transfer to a large pitcher and chill until cold, at least three hours.
  6. Serve in a cup and garnish with fresh grated nutmeg.
Makes about 2 quarts.

Wednesday, August 21, 2013

Secret Tamale Pie! (shhh!)

I love tamales, especially the green corn tamales. The texture and flavor of the sweet corn masa gets me every time. Since becoming more aware of the carbs I eat, and trying to minimize them as much as possible, I have discovered roasted cauliflower as a base for a number of dishes including pizza crust and mashed potatoes. Then, it occurred to me. Why not make a tamale masa out of roasted, mashed cauliflower? Well, you know I had to try it and wow, it is fabulous! That's the secret of this tamale pie recipe--roasted cauliflower masa. This recipe makes enough for six. Yum!

Ingredients


  • Two medium heads of cauliflower
  • 1 1/2 teaspoon oregano
  • 2 eggs
  • 1 cup fresh finely-grated parmesan cheese
  • 1 5-ounce can corn kernels, drained
  • 18 ounces chorizo 
  • One onion, chopped
  • 12 ounces of mild, chopped, roasted green chiles (3 4-ounce cans)
  • 2 cups shredded cheese (colby and jack mixture works well)

Method 


  1. Pre-heat oven to 400º F.
  2. Prepare a large rimmed baking sheet with cooking spray.
  3. Clean the leaf stems from the heads of cauliflower and slice heads into 1/2 inch slices.
  4. Arrange cauliflower slices on the baking sheet.
  5. Bake cauliflower in oven for 30 minutes or until fork tender. Remove and let cool for about 10 minutes.
  6. While the cauliflower is cooking, sauté the chorizo in a frying pan over medium heat, stirring until cooked through, about 15 minutes.
  7. Remove chorizo from pan leaving as much of the grease in the pan as possible.
  8. Sauté the chopped onions in the chorizo grease until translucent, about 10-12 minutes.
  9. Reduce the oven temperature to 350º F.
  10. Grease a 13" x 9" baking dish with cooking spray.
  11. To make the masa, combine the cauliflower, oregano, eggs, corn, and parmesan cheese in a food processor and process for about 30 seconds until well combined. The consistency should be like a paste.
  12. Using a spatula, spread the cauliflower mixture evenly in the baking dish.
  13. Mix the onions, chorizo, and green chiles and spread evenly over the cauliflower mixture.
  14. Evenly distribute the shredded cheese over the top of the mixture in the baking dish.
  15. Bake for 30 minutes or until the cheese starts to brown and is bubbly.
  16. Remove from oven and let set for 10 minutes. Slice into squares and serve!
Step 4
 
Step 6

Step 8
Step 11
Step 12

Step 16

Saturday, April 27, 2013

That's amore! Zucchini Pizza Boats!

Zucchini Pizza Boats

I'm in love! All the goodness of pizza with no crust! I know that if my mother had made these for me when I was a child, I would have asked to have these every day of the week. The concept is simple. Hollow out zucchinis, fill them with your favorite pizza topping and bake. Voila! Atkins-friendly, gluten-free pizza. Experiment with different toppings and go nuts. The kids will love these and be eating their vegetables too! Enough writing, I have to go make these again! Yum!

Ingredients


  • 4 medium zucchinis
  • 1 lb. hot Italian sausage
  • 1/4 cup pizza sauce or Demitri's Bloody Mary Mix
  • 1 lb. good-quality mozzarella cheese, grated
  • 1 cup grated parmesan cheese
  • 1 cup grated cheddar cheese


Method


  1. In a sauté pan over medium heat, brown the sausage for 10-15 minutes. Sausage should be cooked through.
  2. Remove sausage from heat and set aside.
  3. Preheat the oven to 350ºF.
  4. Slice each of the zucchinis in half lengthwise end-to-end.
  5. Using a small melon baller, hollow out each zucchini half being careful not to break the skin.
  6. Tear off a large section of heavy-duty foil about twice the width of a rimmed baking sheet.
  7. Place the foil on the sheet folding ridges the length of the baking sheet every inch and a half until you have about four or five ridges formed and all the foil fits onto the baking sheet (see below). The troughs created by the foil ridges will keep the zucchinis from tipping over while baking.
  8. Place the zucchinis skin side down in the foil troughs in the baking sheet.
  9. Place a tablespoon or two of sauce into each of the zucchini boats.
  10. Carefully spoon the sausage into each of the zucchini boats.
  11. Top the zucchini boats with the mozzarella cheese, then layer on the parmesan cheese, and finally top with the cheddar cheese.
  12. Bake in the oven for 30 minutes until the cheese is brown and bubbly.
  13. Serve at once!


Serves four as a main course, eight as a snack.

Zucchinis hollowed out in their foil troughs.

Sauce and meat in place!
Topped with the cheeses, ready for the oven.

Monday, April 22, 2013

Super Easy, Super Cheesy Chile Relleno Squares


I have to say that some of my most favorite dishes contain green chiles and cheese as the main ingredients. There is just something about the texture and flavor that makes it a real comfort food for me. This recipe really highlights these two ingredients which combine to make a great appetizer or side dish. They are so easy to make and so creamy delicious that I'm sure this dish will become one of your favorites for entertaining or even just to have during the week. These delectable morsels pair nicely with a fruity Pinot Grigio wine. Yum!

Ingredients


  • 2 cups Mexican shredded cheese (usually a combination of colby, jack, and cheddar)
  • 2 cups shredded sharp cheddar cheese
  • 8 oz. chopped mild green chiles (two four-ounce cans)
  • 2 eggs
  • 2 tablespoons heavy whipping cream
  • 1 tablespoon flour (substitute almond flour for a gluten-free alternative)

Method


  1. Preheat oven to 375ºF.
  2. Grease an 8-inch square baking dish with cooking spray.
  3. Evenly spread two cups of the Mexican shredded cheese in the bottom of the prepared baking dish.
  4. Layer the green chiles evenly on top of the cheese.
  5. Evenly spread the two cups of cheddar cheese on top of the green chiles.
  6. In a bowl or 2-cup measuring cup, beat the eggs, cream, and flour. Pour over the cheese.
  7. Bake at 375ºF for 30-35 minutes until set and the top becomes light golden brown.
  8. Cut into small squares and serve warm.


Makes 16 servings.

Monday, April 8, 2013

Jorge's Chicken Chorizo


Chicken is a weeknight staple for a lot of people and it is in our house. Grill it, bake it, fry it, chicken can be a quick and satisfyingly tasty meal. But it can also become boring. "Chicken again?" If you have become bored with your chicken dishes, you must try this one. Quick and easy and soooo delicious, this dish satisfies the tastebuds. Although it uses chorizo, a Mexican pork sausage, it is not overly spicy and therefore very approachable for people how tend to shy away from spicy foods. The added fat in the chorizo and salt pork make this a very satisfying dish that will fill you up. Oh yes, of course it is gluten free, Atkins friendly, and paleo diet worthy! Try it tonight for something different--you won't regret it! Yum!

Ingredients


  • Four chicken thighs (with skin and bone)
  • 4 - 5 ounces chorizo
  • 1 4-ounce can of mild diced and roasted green chiles
  • 4 ounces of salt pork
  • About a dozen green olives
  • 20 whole cloves of garlic


Method


  1. Preheat the oven to 325ºF on convection roast setting or 350ºF for non-convection ovens.
  2. In a 9-inch glass baking dish, add the green chiles and olives and spread evenly to cover the bottom of the dish.
  3. Slice the salt pork into 1/4" slices and cover the olive and green chile mixture.
  4. Divide the chorizo into four "pieces" and place each piece underneath the skin of the chicken thigh. Use your finger to separate the skin from the thigh meat, making a pocket. Flatten the chorizo once under the skin to evenly cover the thigh meat.
  5. Place the chicken thighs in the baking dish on top of the salt pork.
  6. Arrange the garlic cloves in the crevices formed by the chicken thighs.
  7. Drizzle the tops of the thighs and garlic with extra virgin olive oil.
  8. Add salt and pepper to taste.
  9. Bake for one hour.
Serves four.


Step 2: Green chiles and rough-chopped olives
Step 3: Salt pork. Mmmmm....


Step 8: Ready for the oven!

Tuesday, March 26, 2013

Jorge's Mushroom Gratin


When I first made this gratin, I was overwhelmed by how rich and filling it was--but in a good way! A mere seven ounces is easily enough for a meal or a side-dish for two people. The gooey cheese and reduced cream and touch of fennel combine to make an outrageously satisfying comfort dish. Forget macaroni and cheese. This gluten-free, Atkins-friendly pot of lusciousness will be your go-to comfort food on a rainy day with a healthy glass of buttery chardonnay. Yum!

Ingredients
The yellow Wonder Cup is perfect for measuring
and dispensing the sour cream.


  • 4 tablespoons butter
  • 1 large yellow onion, chopped
  • 1 pound cremini mushrooms (or baby portabellos)
  • 1 pound white button mushrooms
  • 1 1/2 tablespoons dry vermouth
  • 2/3 cup sour cream
  • 1 1/2 cup heavy whipping cream
  • 1/3 cup chopped scallions (the green part)
  • 1 pinch nutmeg
  • 1/2 teaspoon fennel seeds
  • salt and pepper to taste
  • 1 1/2 cup grated gruyere cheese
  • 1 teaspoon crushed red chile peppers

Method

  1. Preheat oven to 400ºF.
  2. Coarsely chop the mushrooms (see below).
  3. In a small pot, heat the whipping cream over medium heat and reduce by half. You can do this as you prepare the rest of the dish. Stir frequently otherwise the cream will bubble and overflow! The goal here is to turn the cream into a white sauce by reducing it. This saves us from having to use flour and butter for the sauce.
  4. Melt the butter in a large skillet and sauté the onions until they begin to color, about 8 minutes.
  5. Add the mushrooms and sauté until they release their liquid, and then until the liquid has evaporated and mushrooms are nicely browned, about 18-20 minutes.
  6. Stir in the vermouth and cook another three minutes.
  7. At this point your cream should have reduced by half giving you 3/4 cup of reduced cream sauce. Add a pinch of salt to the sauce.
  8. Stir in the sour cream, 1/2 cup of the reduced cream sauce, 3/4 cup grated gruyere cheese, green onions, nutmeg, fennel seeds and salt and pepper. Mix well and cook for another three minutes.
  9. Divide the mixture among 4 ovenproof ramekins (7 ounce size) or custard cups placed on a cookie sheet (these will overflow so be sure to use the cookie sheet to protect your oven). Spread a tablespoon of the reduced cream sauce over each ramekin and sprinkle generously with the remainder of the gruyere cheese.
  10. Bake for 12 minutes or until bubbly and browned on top.
  11. Remove from oven and sprinkle with crushed red chile peppers. Let set for 5 minutes before serving.
Makes 4 individual servings or 6 side-dish servings.

Step 2: Half of the coarsely chopped mushrooms


Step 9: Ready for the oven!

Sunday, March 24, 2013

Jorge's Mexitali Pizza


Italy meets Tucson in this southwestern take on the traditional pizza! Use the cauliflower crust recipe on this site for a gluten-free option. This makes a great quick meal for during the week or for a party appetizer or snack. Yum!

Ingredients


  • 1/2 cup chopped green olives
  • 3/4 cup tomatillo sauce or salsa verde
  • 1/2 cup chopped, fire-roasted green chiles
  • 3/4 cup browned, Italian sausage
  • 2 cups shredded sharp cheddar cheese
  • 1 cauliflower pizza crust

Method


  1. Preheat oven to 400ºF.
  2. Brown the sausage over medium heat in a medium pan until cooked, about 10 minutes.
  3. Mix the tomatillo sauce and green chiles together and spread evenly over the pizza crust.
  4. Spread the cheddar cheese evenly over the pizza crust.
  5. Distribute the sausage and olives evenly over the pizza crust.
  6. Bake for 10 minutes.


Serves six!

Cauliflower Pizza Crust


It seems that cauliflower pizza crust is taking the blogosphere by storm and everywhere you look there is a variation of this gluten-free wonder. And why not? Cauliflower is a good source of vitamin C and manganese, contains high amounts of vitamin K and omega-3 fatty acids, and gives you a good dose of fiber to boot. Best of all, it's a fun way to eat cauliflower! But how can you make it a crust?

Well, the first problem in turning cauliflower into a crust that you can load up with your favorite pizza toppings and actually pick up by hand, is that the moisture in cauliflower works against you. Sure, you can boil it and try to squeeze out the liquid by hand (ugh!) or you can dry it out during the cooking process. That's what I do here in this recipe. The result is a very descent crust which serves nicely for an assortment of toppings. But be careful with how many toppings you use or you will need to eat it with a fork. Regardless, this is a very delicious and nutritious alternative to pizza dough. Yum!

Ingredients


  • 1 medium head of cauliflower
  • 1 egg, beaten
  • 1/3 cup (about 4 oz.) goat cheese (chèvre)
  • 1/2 cup grated romano or parmesan cheese
  • 1 teaspoon oregano
  • 1/8 teaspoon kosher salt

Method

  1. Preheat the oven to 375ºF on convection (400ºF if you don't have a convection oven).
  2. Clean and de-stem the floretts from the cauliflower head and place in a food processor. Depending on the size of your food processor, you may need to work in batches for the next step.
  3. Pulse the cauliflower in the food processor until the cauliflower resembles rice (see below).
  4. Turn out the processed cauliflower onto a greased rimmed baking sheet. Spread out evenly on the cooking sheet (see below).
  5. Cook the cauliflower for 20 minutes in the preheated oven until you start to see little brown bits forming. Remove and let cool for 10 minutes.
  6. In a medium-sized mixing bowl, add the cauliflower, egg, cheeses, oregano, and salt. Mix thoroughly together with your hands until fully incorporated.
  7. Place a piece of parchment paper on a 9 x 13 inch rimmed jelly roll pan. You can also use a cookie sheet but the jelly roll pan is the perfect size (see below). It is VERY important to use parchment paper for this process otherwise your crust will burn!
  8. Press out the cauliflower mixture evenly into the pan going up to the edges (see below).
  9. Turn off the convection setting on your oven and set to 400ºF.
  10. When the oven is heated, bake the crust for 30 to 35 minutes until dark golden brown (see below).
After you finish the crust, load it up with your favorite toppings and cook at 400ºF for about 10 minutes. Eat and enjoy immediately!

Step 2: Ready to pulse!

Step 3: Cauliflower "rice"

Step 4. Ready to cook!
Step 7: TIP--crush the parchment paper into a ball and then
unroll it to flatten it out. This will remove the annoying "curl."

Step 8: Cauliflower mixture pressed into the jelly roll pan.

Step 10: Golden brown and delicious!

Add any toppings you like to make a fabulous gluten-free pizza!


Saturday, March 23, 2013

Crustless Quiche Tucson


I grew up with the saying "Real men don't eat quiche!" but I never paid any attention to that. I ate quiche but was really never a huge fan. I always found them to be too bland and not very satisfying to the palate. I wanted to change that perception because I always felt that this dish could really rise to the occasion with the right ingredients and become a truck stop favorite, if you will, appealing to both men and women.

If you have poo-pooed quiche in the past, you will want to taste this recipe. It will change your mind about quiche forever! Oh, and this recipe is TOTALLY Atkins friendly and gluten-free so enjoy without guilt!

Ingredients

  • 8 ounces of thick-sliced bacon (about six slices) cut into 1" pieces
  • 1 medium yellow onion, diced
  • 1 medium red bell pepper, diced
  • 1 9-oz. bag of baby spinach
  • 2 cups shredded sharp cheddar cheese (recommend Tillamook)
  • 5 eggs, beaten
  • 1/2 cup heavy whipping cream
  • 1 teaspoon Ancho chile powder
  • salt and pepper to taste

Method

  1. Preheat oven to 375ºF.
  2. In a large, heavy pan, cook the bacon over medium heat until cooked, about 15 minutes. Bacon should be brown with the bacon grease forming a "foam."
  3. Using a slotted spoon, remove the bacon from the pan.
  4. Add the onions and red bell pepper to the bacon fat in the pan and cook over medium heat until the onion becomes translucent, about 10-12 minutes.
  5. Add a handfull of spinach at a time to the onions and bell pepper, stirring, until the spinach is wilted and you have added all the spinach to the pan.
  6. Remove the pan from the heat and stir in the bacon.
  7. In a medium-sized mixing bowl, combine the cheese, eggs, cream, and Ancho chile powder. Thoroughly mix.
  8. Add the bacon, onion, spinach, and bell pepper mix from the pan to the mixing bowl. Stir until incorporated.
  9. Grease a 9-inch glass pie plate and pour the quiche mixture into the plate.
  10. Bake at 375ºF for 40 minutes.
  11. Remove from oven and let rest for 10 minutes before serving.
Serves six.
Mmmm....bacon!


This is just half the spinach!
All spinach with bacon added
 ready for egg mixture

Pre-Oven

Saturday, February 23, 2013

Classic Dutch Baby, Baby!


I always forget how easy these are to make and what a stunning presentation they are to guests. Not only just a breakfast entree, you can put any type of filling or condiment in these after they bake such as cheese, maple syrup, baked apples, etc. Personally, I think they are best for breakfast served with lots of powdered sugar and lemon juice. Easier to make than pancakes!

Ingredients

  • 2 eggs
  • 1/2 cup flour
  • 1/2 cup milk
  • pinch of salt
  • pinch of nutmeg
  • 2 tablespoons butter

Method

  1. Pre-heat oven to 425ºF.
  2. Beat eggs in a medium mixing bowl.
  3. Stir in the milk with the eggs.
  4. Sift the flour, salt, and nutmeg into the milk and eggs incorporating as you go.
  5. Melt the butter in a 9-inch glass pie plate in the pre-heated oven.
  6. Remove the pie plate and distribute the melted butter. Pour in the batter. Do NOT stir!
  7. Place the pie plate back into the oven and bake for 20 to 25 minutes.
  8. Remove from oven and let cool briefly. Transfer to a plate and sprinkle with powdered sugar and lemon juice.


Enjoy immediately!

Monday, January 28, 2013

Sonoran Chicken Wings

Sonoran Chicken Wings
These tasty wings are perfect for your Super Bowl party or even as a main course! Even though they are baked, they are crispy and taste like they have been fried. The sauce provides a rich coating similar to a batter and the flavors are well balanced--just the right amount of sweet, tang, and spice. These will go fast so you might want to make two batches. Yum!

Ingredients

Method

  1. Pre-heat convection oven to 350ºF (375ºF if oven is not convection).
  2. Rinse the wings thoroughly in cold water and pat dry with a paper towel.
  3. In a large mixing bowl, toss the wings with the vegetable oil and ample amounts of salt and pepper.
  4. Arrange wings, skin side down, on a pre-greased, rimmed baking sheet.
  5. Cook wings on the middle rack in the oven for 30 minutes.
  6. Remove wings and flip over to other side.
  7. Put wings back in the oven and cook for another 20 minutes.
  8. Remove wings from oven and toss with the BBQ sauce in a large mixing bowl. Coat the wings thoroughly with the sauce.
  9. Arrange wings on the baking sheet and return to the oven, cooking for another five minutes.
  10. Remove the wings, plate, and enjoy!

Serves six. No, who are we kidding, serves three or four tops!

Sonoran BBQ Sauce

Jorge's Sonoran BBQ Sauce
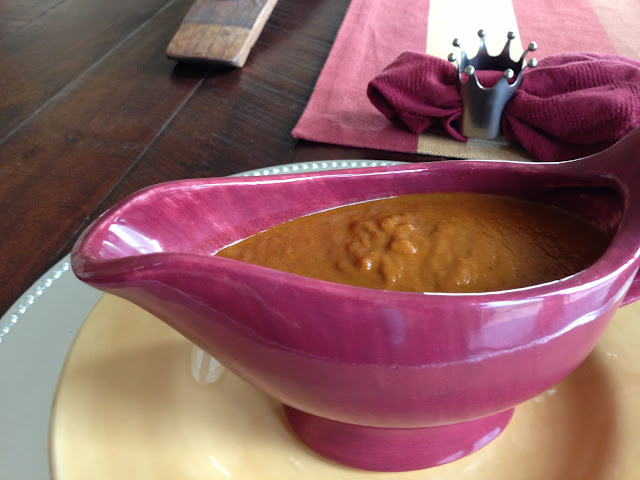
The inspiration for this sauce hit me when I decided one day to make a Sonoran version of chicken wings. I wanted a sauce that embraced local chiles and produced a sweet, tangy, and spicy blanket for coating the chicken wings. I also wanted to make something versatile enough that I could use when I'm grilling. This sauce has it all and is pretty tasty for being sugar-free, low-carb, and gluten-free. If you taste the sauce alone, you might think it too spicy. But if you use it to coat any kind of meat for grilling, the spice fades nicely into the background. I think you will find all sorts of ways to use this sauce. I recommend it for chicken wings or skewers. Yum!

Ingredients

  • 2 tablespoons butter
  • 1 onion chopped
  • 3 cloves garlic sliced
  • 1/4 cup mild Santa Cruz chile powder
  • 2 tsp Mole Ole! spice from World Spice
  • 1 tsp ground cumin
  • 1/4 tsp cayenne pepper (or less if you are spice averse)
  • 1 1/2 cup chicken stock (recommend the Better Than Bouillon gluten-free base)
  • 3 tsp apple cider vinegar
  • 15 drops liquid Stevia Clear Sweet Drops (available at Whole Foods or online)

Method

  1. In a medium sauce pan, melt the butter and sauté the onions for 10 to 12 minutes until translucent.
  2. Add the garlic and sauté for a minute more.
  3. Add chicken stock, chile powder, Mole Ole!, cumin, cayenne pepper, and vinegar.
  4. Bring sauce to a boil and simmer, covered, on low for 20 minutes.
  5. Remove sauce from heat and let cool for 10 minutes.
  6. Pour sauce into a blender and add the liquid Stevia. Puree until smooth. Sauce will be thick!

Makes about two cups.

Sunday, January 27, 2013

Faux-tato Pancakes

Spaghetti Squash Faux-tato Pancakes
I recently changed my eating habits over the past several months and am focusing on low-carb (or no carb) and gluten free options. For me, it was a decision to lose weight and get healthier and I've been having great success at it. One of the foods I have reluctantly chosen to give up has been potatoes. I've never been over-the-moon about potatoes but, you know, when you can't have something you start craving it--and boy, have I been craving potatoes!

As I now have focused my eating to just meat, vegetables, and dairy, I have discovered how versatile spaghetti squash can be. It has a wonderful sweet taste and can serve as a foundation for a variety of different foods and yes, even replacing potatoes! So it occurred to me one day, what if you could replicate a potato pancake using spaghetti squash? Well, it turns out you can and they are just absolutely fabulous! This low carb, gluten-free substitute to potatoes works quite well. So after several nearly successful attempts, I have settled on the following combinations and recipe to provide a tasty substitute to the potato pancake.

I recommend serving these with a soft-poached egg, sprinkled with black sea salt, and a dollop of sour cream. Yum!

Ingredients

  • 1 egg
  • 1 small spaghetti squash (about 2 1/2 cups cooked)
  • 1/2 cup chopped green onions
  • 1/2 cup chopped cooked bacon
  • 1 cup shredded parmesan cheese
  • 2 tablespoons melted butter or bacon fat
  • 3 tablespoons almond flour
  • Salt and pepper to taste
  • Sour cream for topping

Method

  1. Preheat oven to 375ºF convection or 400ºF non-convection.
  2. To cook the spaghetti squash, use a two-pronged meat fork or something similar to poke several holes in the squash. Cook the squash in a 375ºF oven for one hour. Let cool for 20 minutes. Using an oven mitt, hold the squash and cut off the stem end. Slice in half, stem to end. Clean out the seeds using a spoon. Use a fork and scrape out the insides of the squash onto paper towel. Dry the squash as best as possible and measure out your amount.
  3. In a medium mixing bowl combine the egg, squash, green onions, bacon, cheese, almond flour, and butter and mix thoroughly with a wooden spoon.
  4. Spoon about 1/4 cup of the squash mixture onto a greased cookie sheet. Flatten to make 4-inch pancakes. Although the picture, see below, only shows four pancakes, you should be able to get six pancakes per cookie sheet.
  5. Bake for 15 minutes.
  6. Immediately serve one or two pancakes per serving topped with sour cream and/or a soft poached egg.
Makes six pancakes


Sunday, January 20, 2013

Russian Ragout

Russian Ragout
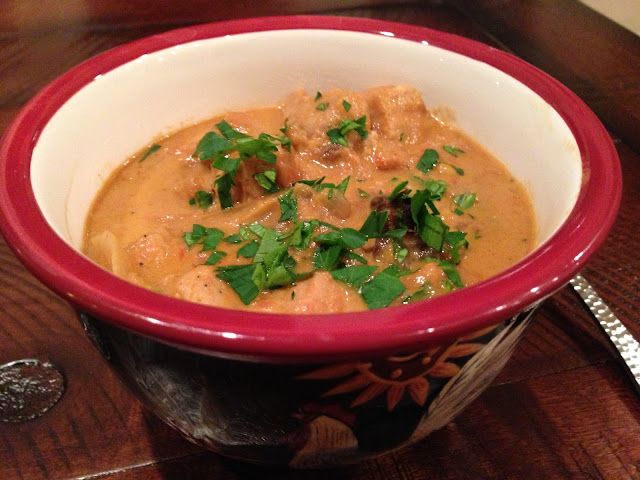
Many good ideas are the result of serendipity or happy accidents. Such is the case with this recipe. I started out wanting to make a veal goulash but, through lack of one key ingredient, laziness to go to the store (I'm sure you can relate), and the need to get dinner on the table, I got creative. Now the creative process for me with food goes either one way or the other--stunning success or miserable failure. There are rarely moments in between. Needless to say, I feel this came out on the success side of my creative spectrum. Granted, this dish leans more to the Hungarian style goulash and probably could be called a goulash instead of a ragout. Semantics aside, Russian Ragout slides off the tongue more easily. I hope you enjoy this dish. I would serve it with or over potatoes, sauerkraut, or even in a sourdough bread bowl. Yum!

Ingredients

  • 8 ounces dried porcini mushrooms
  • 1 cup boiling water
  • 1/2 stick (4 tablespoons) unsalted butter
  • 2 pounds cubed pork (use boneless pork chops--better value)
  • 14 ounces sliced yellow onions (about two small or one large sliced in 1/4" slices from stem to root)
  • 1 1/2 teaspoons chopped garlic (3 to 4 cloves)
  • 6 peeled and seeded ripe vine tomatoes, chopped
  • 1/3 cup vodka
  • 1 teaspoon kosher salt
  • 1/2 teaspoon ground black pepper
  • 2 cups mushroom broth (recommend Better Than Bouillon Mushroom Base)
  • 1 teaspoon fennel seeds (crushed using a mortar and pestle or chopped)
  • 2 teaspoons paprika 
  • 1 cup full-fat sour cream
  • 3 tablespoons chopped parsely 

Method

  1. First, soak the porcini mushrooms in the boiling water for at least 15 minutes (don't boil the mushrooms, though). Save the water.
  2. Heat the butter in a heavy pot over medium-high heat.
  3. Working in batches, brown the pork in the butter. Add salt and pepper to taste as you go.
  4. Add the onions to the meat and cook for 5 minutes.
  5. Add the vodka to deglaze the pot.
  6. Add the garlic and cook for an additional minute.
  7. Add the tomatoes, mushrooms with liquid, broth, salt and black pepper and bring to a boil.
  8. Reduce heat and simmer uncovered for 30 minutes.
  9. Remove the meat from the pot (Really? YES! I know it's a pain but it keeps the meat from getting tough) with a slotted spoon and set aside.
  10. Bring sauce to a boil and reduce by half (about 15 - 20 minutes).
  11. Reduce heat to medium and using a large whisk, mix in the sour cream to the sauce.
  12. Add the meat back to the pot along with the fennel seeds and paprika.
  13. Reduce heat and simmer uncovered for another 20 minutes.
  14. Serve in bowls, over sauerkraut, or over potatoes with chopped parseley.


Serves six to eight.

Friday, January 18, 2013

Fudgy Bacon Chipotle Brownies

Well, the Holidays are over and we're into the doldrums of January. I performed my annual gluttonous duty last month and consumed my fair share of sweet, gooey treats and morsels. But having lived the austere diet I routinely set for myself in January, my mind is drifting back to chocolate, chocolate, and more chocolate! So I dug back through my recipe archive and resurrected an old friend--my fudgy bacon chipotle brownie recipe! Mmmmm. This warm, luscious, hug of a brownie will shake off your winter doldrums and caress your taste buds back to happiness. The smokey flavor from the bacon and spice from the chipotle pepper swirl in your mouth with the rich chocolate to create a heavenly choir of chocolate hymns the angels above would adore! I love these brownies with espresso or a deep roast black coffee. For breakfast? Sure! After all, they do have BACON! Yum!

Ingredients

  • 3 to 4 slices thick-cut, hickory smoked bacon, chopped
  • 1 chipotle pepper in adobo sauce minced (remove most of the sauce before mincing)
  • 6 ounces unsalted butter
  • 3 ounces (2/3 cup) unbleached all-purpose flour; more for pan
  • 2 cups fine granulated sugar
  • 4 large eggs, at room temperature
  • 1/2 teaspoon pure vanilla extract
  • 2 1/2 ounces (3/4 cup) unsweetened natural cocoa powder
  • 1/2 teaspoon baking powder
  • 1/2 teaspoon table salt

Method

  1. Pre-heat oven to 350˚F with rack positioned in the center of the oven.
  2. Cook bacon in a pot over medium heat until just crispy for about 10 minutes. Remove pot from the heat. Remove bacon with slotted spoon and drain over paper towels. Drain grease from pot. 
  3. Using some of the bacon grease and about 1/4 cup of flour, grease and flour a 9” x 9” metal baking pan tapping out the excess flour.
  4. Return the pot to stove and melt butter over medium heat.
  5. Remove pot from the heat and whisk in the sugar, eggs and vanilla until sugar dissolves.
  6. Stir in the flour, cocoa, baking powder and salt, starting slowly to keep the ingredients from flying out of the pot and stirring more vigorously as you go.
  7. Stir until the batter is smooth and uniform, about 1 minute.
  8. Stir in the bacon and chipotle pepper.
  9. Spread the batter into the prepared baking pan, smoothing it so it fills the pan evenly.
  10. Bake until a toothpick or a skewer inserted 3/4 inch into the center of the brownies comes out with just a few moist clumps clinging to it, about 40 minutes.
  11. Let the brownies cool completely in the pan on a rack.
Serves 16

Thursday, January 17, 2013

Jorge's Chile Tucson

Jorge's Chile Tucson
One of my favorite Mexican dishes is Chile Colorado--chunks of tender beef in a deep, red chile sauce. Since returning to Tucson, I have tried several versions of this fabulous dish from numerous restaurants in town. From deconstructing the most flavorful varieties, I have developed this recipe which holds true to the roots of this dish. This is not what people would consider "spicy," however, you can moderate the heat based on the number of chile seeds from guajillo chili pods you include in the dish. This recipe embraces the Sonoran cooking ingredients available locally and relies heavily on the thicking and deep chile taste from dried Santa Cruz red chiles. I have tried several different methods of cooking this dish and have found that low-and-slow is the best method which is why I strongly recommend using a crock pot. Yum!

Ingredients

Method

  1. Using kitchen scissors, cut the stems off the chile pods and open the pods by cutting lengthwise. Remove the seeds. Leave a few if you want some spice to the dish.
  2. Cut the chile pods into 1/2 inch strips and heat, with the cumin seeds, in pan over medium heat to release the flavors about two minutes.
  3. Combine all ingredients in the crock pot and cook on low temperature for about six to seven hours.
  4. Serve with flour tortillas and topped with shredded cheddar cheese and sour cream.
Serves four to six.